


Table of Contents
- What You’ll Need Before Managing an HVAC Installation Project
- Step 1: Define Project Objectives and Scope
- Step 2: Build a Realistic HVAC Installation Project Timeline
- Step 3: Managing HVAC Installation Budgets Without Surprises
- Step 4: Use an HVAC Site Supervision Checklist for Every Stage
- Step 5: Meet HVAC Compliance and Safety Regulations
- Step 6: Integrate Digital Tools and Plan for Supply Chain Disruption
- Step 7: Track Sustainability and Energy Efficiency Reporting
- Frequently Asked Questions
Last Updated: September 14, 2026
What You’ll Need Before Managing an HVAC Installation Project
Managing HVAC installation projects is the discipline of coordinating design, procurement, labour and compliance so a heating and cooling system is delivered on time, on budget and to specification. The projects that run smoothly are the ones with groundwork done before a single technician arrives.
HVAC installation projects fail at the planning stage far more often than on site. A project manager needs five things locked in first:
- A defined scope with room-by-room heating and cooling requirements
- Load calculations completed by a qualified engineer, not estimated from floor area
- A realistic budget with contingency for equipment lead times
- A compliance map covering electrical, refrigerant and building requirements
- A single point of contact for the client, so decisions do not stall
The most common mistake is ordering equipment before load calculations are finalised. Oversized systems short-cycle, run inefficiently and cost more in energy bills for the life of the unit.
Step 1: Define Project Objectives and Scope
Every successful HVAC installation starts with a written objective: what the system must achieve, for whom, and by when. Vague briefs like “make the house comfortable” create scope creep, budget blowouts and disputes at handover.
Lock down these elements before design begins:
- Project objectives, target temperatures, zones, occupancy patterns and budget ceiling
- Scope boundaries, what is included (ductwork, controls, removal of old units) and what is not
- Stakeholder alignment, landlord, tenant, builder and occupant sign-off on the brief
- Project assessment, site survey covering roof space, switchboard capacity and existing ductwork
Load Calculations and Design Engineering Phases
Load calculations determine the correct system capacity for each space, accounting for orientation, insulation, glazing and occupancy. Design engineering then translates those figures into equipment selection, duct sizing and zoning layout.
Skip this phase and you are guessing. A mathematically engineered design means the system runs at its rated efficiency rather than compensating for oversized or undersized capacity. For a rental property, that directly affects long-term maintenance costs and tenant comfort.
Step 2: Build a Realistic HVAC Installation Project Timeline
An HVAC installation project timeline should map every phase from design sign-off to project handover, with buffer built in for equipment lead times and weather. Most residential projects run across several weeks once procurement, scheduling and installation are sequenced properly.
A working timeline structure:
| Phase | Typical Duration | Key Dependency |
|---|---|---|
| Design and load calculations | 1-2 weeks | Site survey completed |
| Procurement and equipment order | 2-6 weeks | Design sign-off |
| Installation and site supervision | 2-5 days | Equipment on site |
| Commissioning and testing | 1 day | Installation complete |
| Project handover | Same day | Client walkthrough |
Procurement, Resource Allocation and Subcontractor Coordination
Procurement is where timelines slip. Equipment lead times vary by brand and specification, and a delay on one component stalls the entire schedule. Order early, confirm delivery dates in writing, and keep a substitute specification approved in case supply tightens.
Resource allocation covers which technicians, electricians and subcontractors are booked for which days. Subcontractor coordination matters most for electrical work and any structural modifications. A single point of contact who owns the schedule prevents the classic problem of trades arriving on the wrong day.
Step 3: Managing HVAC Installation Budgets Without Surprises
Managing HVAC installation budgets means tracking every cost line from equipment through to removal of the old unit, with a written contingency for variations. Surprises come from three places: scope changes, hidden site issues and unclear inclusions.
Build the budget in these categories:
- Equipment, indoor and outdoor units, controls, zoning
- Materials, ductwork, refrigerant lines, mounting, insulation
- Labour, installation, electrical, commissioning
- Compliance, certificates, inspections, permits where required
- Removal and disposal, decommissioning and taking away the old system
The most common budget dispute is removal of the old unit. If it is not written into the quote as an inclusion, clients get a surprise invoice at the end. Confirm in writing what is bundled into the installation cost before work begins.
Step 4: Use an HVAC Site Supervision Checklist for Every Stage
An HVAC site supervision checklist is a stage-by-stage verification tool that confirms installation standards are met before the next phase begins. Site supervision catches defects while they are cheap to fix, not after the ceiling is closed.
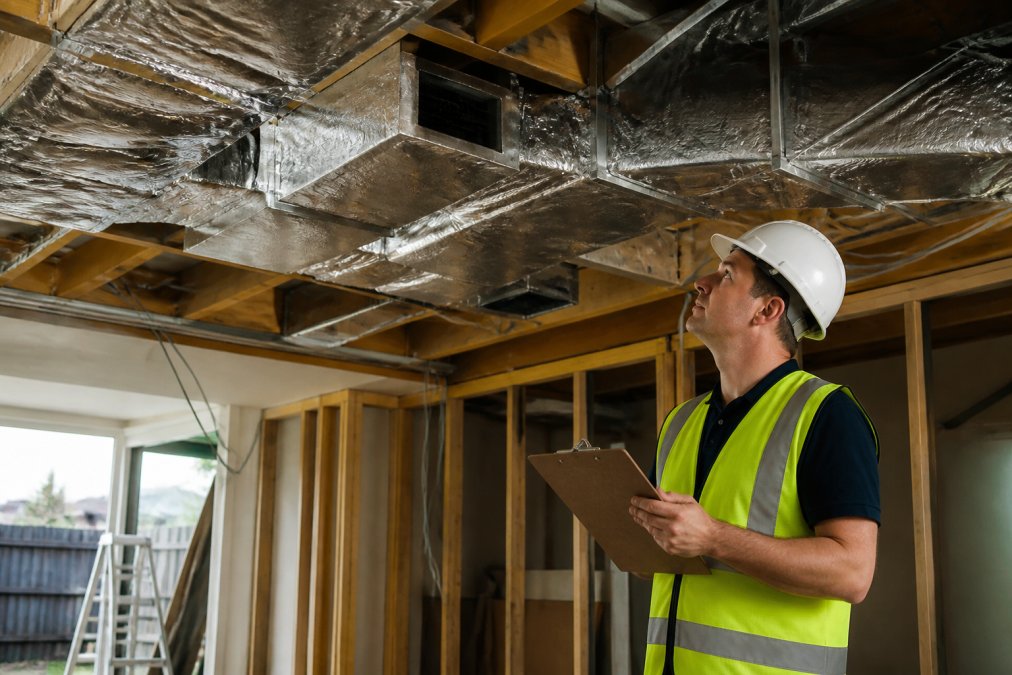
Run this checklist at each stage:
- Ductwork sealed, supported and sized to specification
- Refrigerant lines pressure-tested and insulated
- Electrical connections to code, switchboard capacity confirmed
- Condensate drainage tested and sloped correctly
- Zoning controls wired and labelled
- Outdoor unit clearances and mounting checked
Commissioning, Testing and Project Handover
Commissioning verifies the system performs to design: airflow balanced across zones, refrigerant charge correct, controls responding, and temperatures reached within specification. Testing is documented, not assumed.
Project handover then transfers the system to the client with operating instructions, warranty details and a maintenance schedule. Quality assurance at this stage means the client understands what they have and how to look after it.
Step 5: Meet HVAC Compliance and Safety Regulations
HVAC compliance and safety regulations in Australia cover electrical work, refrigerant handling, and building and plumbing requirements (Refrigerant Handling Licence). Each has its own licensing and documentation obligations, and the project manager is responsible for confirming every trade is appropriately licensed before work starts.
Key compliance areas:
- Electrical, licensed electricians only, with certification on completion
- Refrigerant handling, technicians must hold the required refrigerant handling licence
- Building and planning, permits where structural work or external unit placement requires approval
- Safety on site, working at height, electrical isolation and safe handling of refrigerant
Check current requirements against the relevant regulator before each project, because obligations and thresholds change. Australian Refrigeration Council licensing information sets out refrigerant handling requirements, and Safe Work Australia guidance on electrical safety covers site obligations.
Step 6: Integrate Digital Tools and Plan for Supply Chain Disruption
Most HVAC project guides stop at the phase list. The projects that actually finish on schedule are the ones where digital tooling and supply chain planning are wired into the workflow from day one, not bolted on when something slips.
Where digital tools fit into an HVAC project
Digital tooling is not one product; it is four layers that need to talk to each other.
- Design and load calculation software, produces room-by-room load figures, duct sizing and equipment selection. The output should be exportable, not trapped in a PDF, so it can feed the procurement list and the commissioning targets.
- Building information modelling (BIM), for commercial and multi-dwelling work, a coordinated model lets the mechanical, electrical and structural trades clash-check before anything is fabricated. On residential projects, a simplified 3D model still pays for itself by catching duct routes that will not fit through the available ceiling space.
- Project management platforms, schedule, task assignment, photo evidence and variation tracking in one place. The practical test is whether a site supervisor can log a defect with a photo from a phone and have it appear against the right task before the next trade arrives.
- Building management systems (BMS) and controls, on larger installations, the BMS becomes the commissioning record. Trend logs of airflow, refrigerant pressures and zone temperatures are the evidence that the system performs to design, not just the installer’s word.
The integration point that matters most is the handoff between design software and the procurement list. When the equipment schedule is generated directly from the load calculation, you eliminate the transcription errors that cause wrong-capacity units to arrive on site.
Before adopting any platform, map your current process on one page. If the software does not remove at least one manual step from that page, it will add work rather than save it.
Supply chain disruption mitigation
HVAC equipment is not off-the-shelf stock for most projects. Indoor units, outdoor units, zoning controllers and specific duct components are often built to order, and lead times move with global freight conditions, factory capacity and seasonal demand peaks. A project manager who treats lead time as a fixed number will be caught out.
A workable mitigation framework:
- Map lead times by component, not by system. The outdoor unit may be available in a week while the matching zone controller is six weeks out. The critical path is the slowest single component, not the average.
- Order against the design sign-off, not the installation date. Placing the equipment order the day the design is locked gives the longest possible buffer.
- Get a substitute specification approved in writing before you need it. If the specified model slips, you can switch without a client variation meeting. The substitute must meet the same capacity and efficiency requirements, so approve it at design stage.
- Confirm delivery dates in writing and re-confirm weekly. Verbal assurances from suppliers are not a schedule. A weekly written check catches slippage while there is still time to react.
- Stage the installation around what has arrived. Ductwork, mounting and electrical rough-in can often proceed before the outdoor unit lands, keeping labour productive rather than idle.
- Communicate schedule movement to the client early. A two-week delay disclosed at the start is a planning issue; the same delay discovered on installation day is a trust issue.
A common pattern is that projects which build a two-to-three week buffer into the procurement phase absorb a single supplier delay without moving the handover date. Projects with no buffer stall entirely on the first slip.
Risk mitigation is a schedule decision, not a pessimism exercise
The practical output of this section is a procurement risk register: every long-lead component, its current quoted lead time, its approved substitute, and the date by which the order must be placed to protect the handover date. Review it weekly alongside the site schedule. That single document is what separates a project that absorbs disruption from one that is defined by it.
Step 7: Track Sustainability and Energy Efficiency Reporting
Sustainability reporting on HVAC projects is still rare in practice, which is precisely why it is a differentiator. Clients, particularly landlords, body corporates and commercial tenants, increasingly want evidence of efficiency, not just a star rating on a brochure. A project manager who can produce that evidence at handover adds value no competitor is currently offering.
Build the reporting framework before installation starts
Efficiency reporting only works if the data is captured during the project, not reconstructed afterwards. Set up four measurement points:
- Design baseline, record the calculated load for each zone, the specified system capacity, and the predicted energy consumption at design conditions. This is the benchmark everything else is measured against.
- As-installed record, note any deviation from the design specification: a different model, a rerouted duct, an added zone. Each deviation changes the efficiency prediction and must be documented.
- Commissioning data, airflow per zone, refrigerant charge, static pressure, and measured temperature differential at the commissioning stage. This is the proof that the system performs as designed.
- Handover projection, expected running cost and energy use based on the as-installed system, expressed in a way the client can compare against their previous system or their energy bills.
The design baseline is the single most important record. Without it, you have no way to demonstrate that the installed system meets the brief, and no way to identify efficiency losses later.
What to report at handover
A useful handover report is short and specific. It should include:
- System efficiency rating and what it means in practice, for example, how the rated coefficient of performance translates to expected running cost at typical operating conditions.
- Zoning strategy and its effect, which zones are independently controlled, and how that reduces energy waste compared with a single-zone system.
- As-installed versus design comparison, any deviations and their efficiency impact, stated plainly.
- Recommended preventative maintenance schedule, filter cleaning, coil inspection, refrigerant check intervals. Efficiency degrades with neglect, and the maintenance schedule is part of the efficiency story.
- Expected service life with proper upkeep, and the efficiency loss typically seen as equipment ages.
Why this matters commercially
Efficiency reporting turns a completed installation into a documented asset. For a landlord, it supports the case for the property’s operating cost. For a commercial client, it feeds into broader environmental reporting obligations. For a homeowner, it justifies the specification decision and provides a baseline for future maintenance.
The projects that skip this step hand over a working system and nothing else. The projects that do it hand over a system plus the evidence that it was the right one.
Keep the reporting template consistent across every project. A standard format means the data is comparable, the handover is faster, and the client sees a professional deliverable rather than an ad-hoc summary.
Frequently Asked Questions
What are the responsibilities of an HVAC project manager?
An HVAC project manager oversees the entire project lifecycle, from initial load calculations and design engineering through to procurement, site supervision, commissioning and handover. They coordinate subcontractors, track budgets and timelines, enforce safety compliance, manage technical documentation and act as the single point of contact for the property owner. In practice, strong project management is the difference between an installation that runs to schedule and one that drifts on cost and quality.
How do you effectively manage HVAC installation timelines?
Start with a detailed schedule that maps each phase: design, equipment procurement, site preparation, installation, commissioning and handover. Build in buffer time for equipment delivery delays, which are common. Confirm lead times with suppliers before locking dates, and sequence trades so electricians and ductwork installers are not waiting on each other. Weekly progress checks against the timeline catch slippage early, before it cascades into the final handover date.
What compliance standards must be met during HVAC installations?
HVAC work must comply with Australian Standards covering electrical safety, refrigerant handling and building regulations. Refrigerant work requires a licensed technician under the Ozone Protection and Synthetic Greenhouse Gas Management Regulations. Electrical connections must meet AS/NZS 3000 wiring rules. Mechanical services should follow AS 1668 for ventilation and AS/NZS 5141 for air conditioning design. Your installer should provide compliance documentation at handover, including electrical certificates and refrigerant handling records.
How do you handle unexpected site challenges during an HVAC project?
Unexpected challenges like hidden structural obstacles, inadequate ceiling space or non-compliant existing wiring are common in older properties. The best approach is to conduct a thorough site assessment before quoting, so most issues surface early. When surprises do occur, document the problem immediately, assess the cost and timeline impact, and communicate with the property owner before proceeding with any variation. A single point of contact who knows the project history makes this faster and less disruptive.