


Table of Contents
- How the HVAC System Design Process Shapes Your Installation
- The HVAC Installation Timeline: What Happens on Each Day
- Your HVAC Installation Checklist: From Quote to Handover
- Mounting Units, Ductwork and Pipework: Inside the Installation Phase
- HVAC Commissioning and Testing: The Checks Before Handover
- Common Installation Mistakes and What They Cost Homeowners
- What You Can Do Yourself and What Needs a Licensed Professional
- Frequently Asked Questions
Last Updated: October 8, 2026
How the HVAC System Design Process Shapes Your Installation
Most homeowners think installation day is the main event. It isn’t. The real work happens weeks earlier, when an engineer works out exactly what your home needs.
This guide from Premium Air walks through the full hvac system installation process explained stage by stage, from first measurement to final handover.
Skip it and you get the classic problem: a system that’s too big, cycles on and off, and never feels comfortable.
Load Calculation and Equipment Selection
A load calculation measures how much heat your home gains and loses, factoring in insulation, glazing, ceiling height, orientation and room use.
From those numbers, an engineer sizes the system. Oversizing is a common fault: a unit that’s too large cools too fast, then shuts down before it removes humidity, leaving the air cold and clammy.
Equipment selection follows the load figures, not the other way around. We recommend brands based on time-proven performance rather than sales margin.
Site Assessment and Level Verification
Before installation, the site gets checked for what’s actually there. That means:
- Ceiling space depth and roof pitch
- Access for a crane or hoist if needed
- Existing duct runs and whether they can be reused
- Switchboard capacity for new electrical circuits
Level verification matters more than it sounds. An outdoor unit on a sloped or soft base will vibrate, run louder and wear faster, so we check the pad or bracket with a spirit level before bolting anything down.
Ask for the load calculation figures in writing before you sign. If a quote arrives without them, the capacity was guessed, and guessed capacity is the number one cause of comfort complaints.
The HVAC Installation Timeline: What Happens on Each Day
A typical ducted installation runs two to three days; split systems are often done in one. The HVAC installation timeline depends on system type, roof access and how much ductwork is new.
Here’s how the days usually break down:
| Day | Main Work | Typical Duration |
|---|---|---|
| Day 1 | Site protection, indoor unit positioning, ceiling cut-outs | 4-6 hours |
| Day 2 | Outdoor unit mounting, ductwork routing, pipework and wiring | 6-8 hours |
| Day 3 | Drainage connection, electrical hook-up, commissioning and testing | 4-6 hours |
Multi-storey homes, heritage ceilings, difficult roof access or adding zone control to a house that never had it can stretch this.
Sequence matters. Ductwork goes in before ceilings are closed up, and pipework and refrigerant lines run before the electrical rough-in. Get the order wrong and someone cuts access holes twice.
What Actually Happens on Installation Day, Hour by Hour
Before the crew arrives (the day before):
- Clear the roof space access point, manhole, hatch or external roof access, and remove stored items within about a metre of it.
- Move furniture away from planned indoor unit and outlet positions, or confirm in writing that the installer will do it.
- Secure pets. Roof access, ladders and open doors are a genuine escape risk.
- Confirm parking for the work vehicle and, if a crane or hoist is booked, that the street or driveway can be blocked for the agreed window.
Morning of day one:
The crew protects floors and furniture, then confirms the indoor unit position against the design. This is your last easy chance to speak up.
You’ll be asked to confirm a few things on the spot:
- Which rooms get outlets, and where on the ceiling or wall
- Where the return air grille goes (usually a hallway or central space)
- Where the outdoor unit will sit, and whether it clears windows and neighbouring bedrooms
- Where the isolator switch and controller will be mounted
Day two:
The outdoor unit is mounted and levelled, ductwork is routed through the roof space, and pipework and wiring are run. This is the noisiest day.
Day three:
Drainage is connected, a licensed electrician wires the system to the switchboard, and commissioning begins.
What Can Push the Timeline Out
A two-to-three-day estimate assumes a straightforward roof space and a switchboard with spare capacity. Common delays:
- No spare switchboard capacity. Adding a circuit may require a switchboard upgrade, which is a separate electrical job and can add days.
- Asbestos or fragile ceiling materials. In older homes, ceiling sheeting may need testing before cutting. This stops work until results come back.
- Roof access too tight for the outdoor unit. A crane booking may be needed, and crane availability sets the schedule, not the installer.
- Reusing existing ductwork that fails inspection. Duct found to be crushed, torn or undersized gets replaced, adding a day.
Ask for the timeline in writing with the day-by-day breakdown, and ask what happens if a delay occurs. A written schedule makes it much easier to hold a deposit and a start date to account.
Never let anyone pressure you into skipping the ceiling inspection. A rushed installer who cuts first and measures later can crack plaster, hit a joist or block a roof cavity vent, and repairs come out of your pocket.
How the Timeline Differs by System Type
- Split system (single head): usually one day. Wall or floor console, one outdoor unit, short pipe run.
- Multi-head split: one to two days. More pipe runs and more indoor heads, but no ductwork.
- Ducted reverse cycle: two to three days. Duct fabrication and routing dominate the schedule.
- Ducted with zoning: add half a day to a day for dampers, zone wiring and controller setup.
If a quote promises a single-day ducted install for a multi-room home, ask how duct fabrication, commissioning and electrical sign-off fit into that window. Usually one is being compressed.
Your HVAC Installation Checklist: From Quote to Handover
A written HVAC installation checklist keeps the job honest, tracking what was promised against what was delivered. We use one on every job, and you should ask for one too.
Work through it in this order:
- Written quote with system model, capacity and inclusions listed
- Load calculation figures supplied
- Old unit removal confirmed as included, not extra
- Installation date and expected duration in writing
That last item matters: a named contact means you’re not repeating your address and system details to a new person every call.
Permits, Compliance and Inspection Checkpoints
Most residential installations need electrical work signed off by a licensed electrician.
Your installer should tell you which compliance steps apply before work starts. Ask for the paperwork trail: electrical certificate, refrigerant handling records and any council or building approvals for structural changes.
If a quote doesn’t mention compliance at all, treat that as a warning sign rather than a shortcut.
Mounting Units, Ductwork and Pipework: Inside the Installation Phase
This is the part homeowners actually see, and it’s where workmanship shows. Unit mounting comes first.
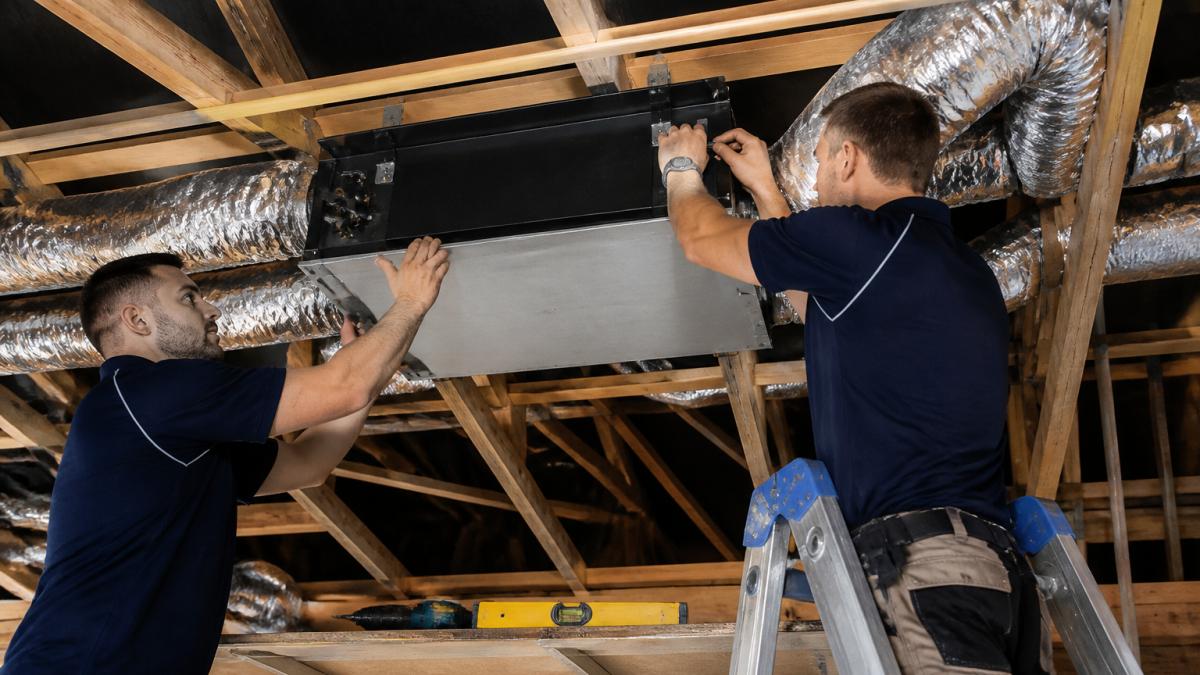
Pipework and refrigerant lines run next, insulated along their full length. Bare pipe loses efficiency and drips condensation.
Then comes the electrical wiring and thermostat mounting. Zone control dampers, if you’re having them, go in at this stage while the ceiling is still open.
Duct Fabrication, Routing and Air Distribution
Ductwork is made to suit your ceiling layout, not pulled off a shelf. Duct fabrication covers cutting and joining main and branch duct sections to fit the actual roof space.
Routing follows the shortest practical path with the fewest bends. Every sharp turn adds resistance and cuts airflow to the rooms at the end of the run.
Good air distribution means:
- Main duct sized to carry total airflow
- Branch duct sized per room, not one size everywhere
- Dampers fitted so rooms can be balanced
- Returns positioned to avoid short-circuiting supply air
With awkward layouts, multiple zones and odd room shapes, engineering beats guesswork.
HVAC Commissioning and Testing: The Checks Before Handover
Commissioning is the proof stage: starting the system, measuring actual performance and adjusting it until it matches the design.
Never accept handover without it. The checks should cover:
- Refrigerant charge and operating pressures
- Airflow at every outlet, measured not estimated
- Temperature split between return and supply air
- Drainage flow tested under load
- Thermostat and zone control function
Ask for the results in writing. A system that measures correctly on day one is far easier to diagnose later if something drifts.
Commissioning results are your baseline. Keep the paperwork. If performance drops in two years, those figures tell a technician exactly what changed.
Common Installation Mistakes and What They Cost Homeowners
Cheap installations fail in predictable ways. Here are the faults we get called out to fix most often:
| Mistake | What It Causes | Typical Fix |
|---|---|---|
| Oversized unit | Short cycling, poor humidity control | Replace with correctly sized unit |
| Undersized ductwork | Weak airflow to far rooms | Re-run main and branch ducts |
| Uninsulated pipework | Condensation, efficiency loss | Re-insulate full pipe run |
| No load calculation | Wrong capacity, discomfort | Full system review |
| Poor drainage fall | Water stains, ceiling damage | Re-route drain line |
| Outdoor unit on soft ground | Vibration, noise complaints | Re-level and re-mount on solid base |
The pattern is consistent. The savings from skipping a step are small. The cost of fixing it later is not.
That’s why we name one contact for the whole job.
What You Can Do Yourself and What Needs a Licensed Professional
Some tasks are genuinely homeowner-friendly. Others are illegal or dangerous to attempt.
You can safely:
- Clear the roof space and provide access
- Move furniture and protect floors
- Note which rooms feel too hot or cold
- Keep filters clean and change them on schedule
- Record serial numbers and warranty dates
You cannot legally or safely:
- Handle refrigerant gas in any way
- Wire the system into the switchboard
- Connect or alter drainage to a fixed line
- Modify ductwork inside a sealed ceiling
- Sign off electrical compliance
Refrigerant work requires a licence, and electrical work needs a licensed electrician. That’s not bureaucracy for its own sake. Both carry real risk of injury, fire or system damage.
Landlords who need low-maintenance systems: ask for zone control and a commissioning report. Both reduce tenant call-outs and give you documented performance if a warranty claim ever comes up.
If you’re weighing up whether to replace a working but ageing unit, it depends on running costs, repair history and how well it still heats and cools. A properly sized modern system often costs less to run, but the numbers have to stack up for your home.
Frequently Asked Questions
What are the steps involved in installing an HVAC system?
A full HVAC installation follows a set sequence: system design and load calculation, site assessment, equipment selection, unit mounting, duct fabrication and routing, refrigerant piping and drainage, electrical wiring and thermostat setup, then commissioning and testing. Each stage builds on the last, which is why the design phase matters most. Skipping or rushing the load calculation typically shows up later as uneven temperatures, higher running costs or a system that cycles too often.
How long does a full HVAC installation take?
Most residential HVAC installation timelines run across two to five days on site. A straightforward split system can be completed in a day, while a ducted system with multiple zones usually needs three to five days for ceiling layout, duct routing, pipework and commissioning. Add time for the quote, design verification and any permits. Your installer should give you a written schedule before work starts so you can plan access and parking.
What should I do to prepare for an HVAC installation?
Clear access to the ceiling space, outdoor unit position and switchboard before the team arrives. Move fragile items away from work areas, arrange parking for the install vehicle, and secure pets. Confirm who will be home and share any strata or body corporate requirements in advance. If you are replacing an old unit, ask whether removal is included in the quote, since that affects both cost and the day-one schedule.
How can I tell whether an HVAC system has been installed correctly?
Ask for the commissioning results before handover. A correctly installed system shows airflow at every outlet matching the design, refrigerant pressures within the manufacturer’s range, no drainage leaks, and a thermostat reading that reflects the actual room. Walk through each zone and check the temperature responds within a reasonable time. Get the commissioning checklist and warranty documents in writing, and confirm the installer will return if performance drifts in the first season.
Replacing heating and cooling is a big decision, and the process behind it matters as much as the equipment. Premium Air designs each system mathematically, gives you one point of contact from enquiry to handover, and includes removal of your old unit in the installation cost. Get a free quote and see what an engineered system looks like for your home.